


How to use GNU Privacy guard

Some have requested help getting started installing GnuPG on a windows system. So I figure I can as might as well write an article that outline the steps necessary. If you have gnupg installed already you can skip this part
The installation procedure has improved magnificently over the past year, introducing a native windows installer which has helped getting a more wide-spread usage.
As a disclaimer you will find graphical front-ends for things I’m going to do but I elect to only use gnupg and its command line for the things I want to do. The front-ends are often tied to e.g. the email application you use, and I have written tutorials that are application-dependant you can look to for that.
What I’m going to start with is a simple procedure of installing GNU Privacy Guard on a Windows system and generate a key. The latter part is valid independent on the operating system used, and the reason I select windows is that GnuPG often follow GNU/Linux and BSD already, and is already available on the system, whereby those who have requested help have been using windows.
So, now to get started
Downloading GNU Privacy Guard
The GNU Privacy guard can be downloaded from http://www.gnupg.org . In the time of writing you can find it by clicking “download” which will lead you to http://www.gnupg.org/(en)/download/index.html . You can find the file itself under “Binaries” and I’m getting the “GnuPG 1.4.7 compiled for Microsoft Windows.”. In my case ftp://ftp.gnupg.org/gcrypt/binary/gnupg-w32cli-1.4.7.exe (Updated: 2022-03-06)
Please, do not just use this link, but try to go trough the procedure yourself in order to get the most updated version. Advanced users can verify the download using sha1sum.
Installing GnuPG
Once downloaded you have the file gnupg-w32cli-X.Y.Z.exe , in my case located on my desktop. To start the installation you simply double click the file, select the language, and press “next” until it completes.
Generating your first key
As stated previously many would use a graphical front-end to do this step, and the client-specific plugins have ways to do this for you, so if you are using one of those clients, use the appropriate plugin.
First you would open a command prompt, pressing the start menu, then run, then you write “cmd”. This will bring up a box that look like:
This is the command line, some basic commands are:
cd – change directory, e.g. “cd dir1” to go into a folder named dir1 and “cd ..” to go back one level.
Now you want to navigate to where you installed GnuPG. In my case that is cd “Program FilesGNUGnuPG”
Now you can execute the gpg.exe binary file using the command “gpg”.
The gpg binary contain everything you need to do. We want to generate a new set of keys. To do that we use “gpg –gen-key”
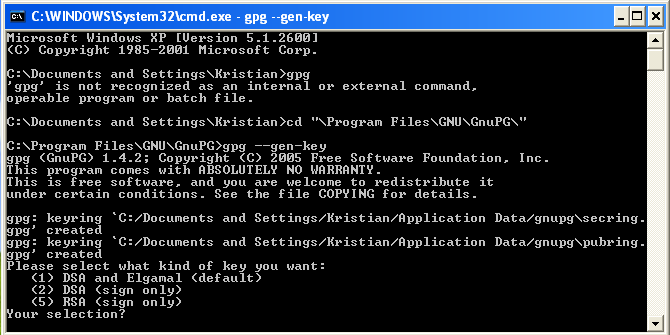
The default option here is a DSA and ElGamal keyset, which is okay for most users. Be aware that if you want to use a digest algorithm such as SHA256 you should select RSA signing key here. If you have such a need, however, you can probably manage from this point onwards without the help of this tutorial.
Pressing the Enter key here use the default option, and bring you to a screen where you can select the size, just press enter here again to use the default, a 2048 bit encryption key and a 1024bit signing key.
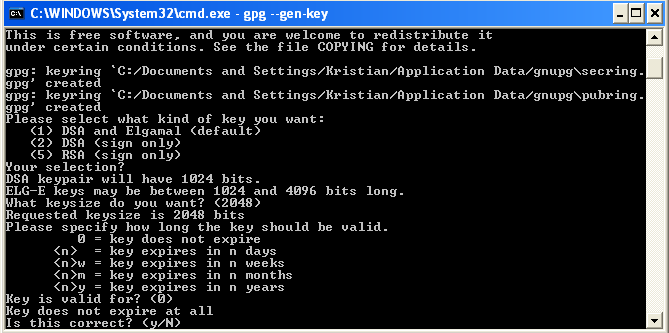
Press enter one more time and you set the key to never expire, and confirm the action by pressing “y”.
You will now be asked to write in your information, your full name and your email address.
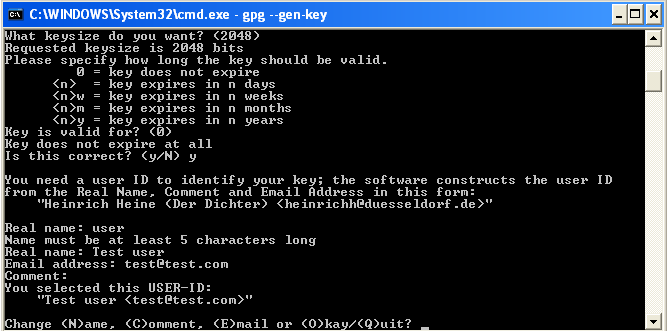
Once correct press “o” to proceed.
You will then be asked to insert a passphrase that is used to protect your private key. Choose one at your will that you will remember.
The next step take some time, but you don’t have to do anything yourself. This is the actual key generation and require some noise in the system, so contrary to other tasks you might be familiar with, the more you use the computer for the faster it goes
Generating a revocation certificate
The next thing you want to do is generating a revocation certificate. This is used in the event that you loose your private key or the passphrase associated with it.
To generate a revocation certificate use the command “gpg –gen-revoke key-id”
The key id- as well as other information abut the key you got after the key was generated. In my case the key is 6B2AFB8 and I use “gpg –gen-revoke 6B2AFB8” to generate the revocation certificate.
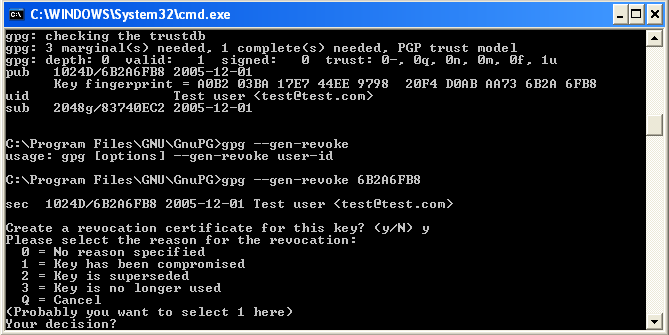
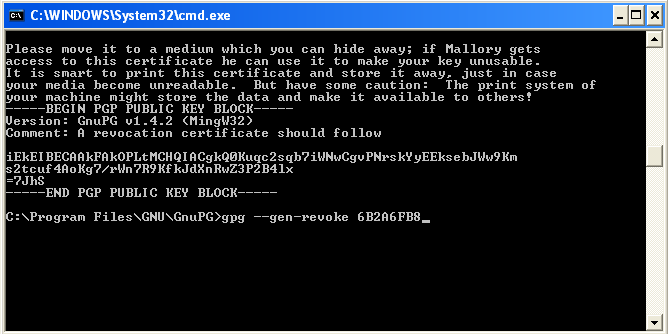
This produce the revocation certificate, in this case it look like
You now have your own keyset that you can use to communicate securely with others. Congratulations.